Comprehensive Guide to Dragon Fruit Plant Cuttings Plantation: Watering, Fertigation, and Monitoring
Dragon fruit, a high-value crop known for its vibrant appearance and nutritional benefits, requires meticulous care during its plantation phase. This guide offers a step-by-step procedure for planting dragon fruit cuttings, including detailed watering schedules, drip fertigation techniques, sprays, and monitoring parameters to ensure a thriving plantation.
Plantation Procedure for Cuttings
1. Pre-Rooting Preparations
Distribute the Cuttings: Unload and evenly distribute the cuttings across the farm.
Prepare Fungicidal Dip:
Mix 500g of SAAF in 5 liters of water.
Dip the cuttings into the solution up to 9 inches for effective protection against fungal infections.
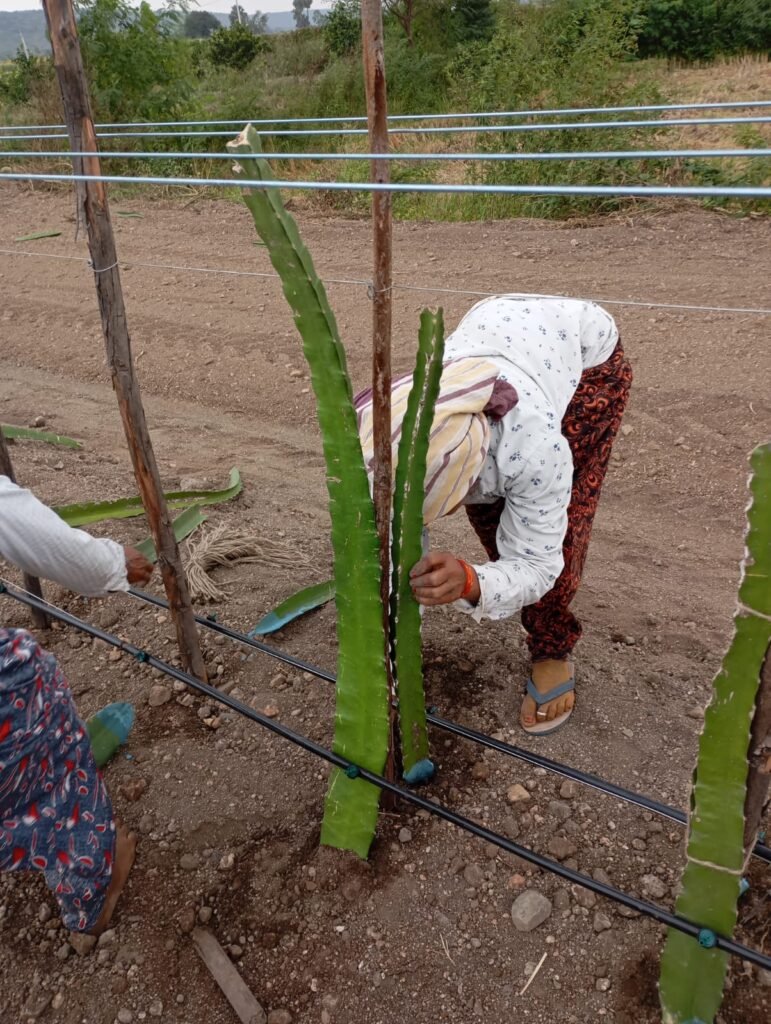
Planting:
Insert the cuttings into the soil to a depth of 6 inches.
Cover any manure applied to the beds with soil to prevent exposure to sunlight and air, ensuring better nutrient retention.
2. Fermented Water Preparation
Prepare this nutrient-rich solution for application on the 3rd or 4th day post-plantation:
Ingredients:
1 kg Trichoderma
1 kg Pseudomonas
1 kg VAM (Vesicular Arbuscular Mycorrhiza)
2 kg Jangiri
Method:
Mix thoroughly in water.
Let the mixture ferment for 3 days.
3. Initial Watering
Provide 2 to 4 hours of watering through drip irrigation immediately after planting to ensure the beds are thoroughly wet.
4. Fungicidal Application
Apply SAAF, Sprint, or Blitox through the drip irrigation system at a rate of 2 kg per acre on the day of plantation.
Follow up with a foliar spray of the same fungicide at 3 grams per liter, ensuring thorough coverage of the cuttings.
5. Continued Care and Observation
Provide 1 to 2 hours of watering through drip irrigation on the 3rd or 4th day post-plantation.
Monitor the plants daily and report any abnormalities.
Root formation typically begins around 3 weeks after planting.

Watering Schedule
Post-Plantation: 2 to 4 hours through drip irrigation to soak the beds.
Follow-Up: 1 to 2 hours on the 3rd or 4th day.
Regular Schedule:
Maintain soil moisture without waterlogging.
Water every 2–3 days during dry periods and adjust based on weather conditions.
Drip Fertigation
Initial Application (Day 3 or 4): Use the fermented water prepared with Trichoderma, Pseudomonas, VAM, and Jangiri through drip irrigation.
Ongoing Fertigation:
Apply balanced fertilizers rich in nitrogen, phosphorus, and potassium (NPK).
Frequency: Biweekly.
Use micronutrient mixtures to address deficiencies as needed.
Spray Schedule
Fungicide Sprays:
Day 1: SAAF, Sprint, or Blitox at 3 grams per liter.
Repeat every 10–15 days during the initial growth phase.
Pest Control:
Use organic or chemical pest control solutions as required.
Monitor for common pests like mealybugs and aphPlantation Procedure for Cuttings
1. Pre-Rooting Preparations
Distribute the Cuttings: Unload and evenly distribute the cuttings across the farm.
Prepare Fungicidal Dip:
Mix 500g of SAAF in 5 liters of water.
Dip the cuttings into the solution up to 9 inches for effective protection against fungal infections.
Planting:
Insert the cuttings into the soil to a depth of 6 inches.
Cover any manure applied to the beds with soil to prevent exposure to sunlight and air, ensuring better nutrient retention.
2. Fermented Water Preparation
Prepare this nutrient-rich solution for application on the 3rd or 4th day post-plantation:
Ingredients:
1 kg Trichoderma
1 kg Pseudomonas
1 kg VAM (Vesicular Arbuscular Mycorrhiza)
2 kg Jangiri
Method:
Mix thoroughly in water.
Let the mixture ferment for 3 days.
3. Initial Watering
Provide 2 to 4 hours of watering through drip irrigation immediately after planting to ensure the beds are thoroughly wet.
4. Fungicidal Application
Apply SAAF, Sprint, or Blitox through the drip irrigation system at a rate of 2 kg per acre on the day of plantation.
Follow up with a foliar spray of the same fungicide at 3 grams per liter, ensuring thorough coverage of the cuttings.
5. Continued Care and Observation
Provide 1 to 2 hours of watering through drip irrigation on the 3rd or 4th day post-plantation.
Monitor the plants daily and report any abnormalities.
Root formation typically begins around 3 weeks after planting.
Monitoring Parameters
Root Development:
Inspect for root formation starting from Week 3.
Ensure healthy and robust root growth.
Plant Health:
Check for signs of disease, pest infestations, or nutrient deficiencies.
Observe color and firmness of stems.
Soil Moisture:
Use moisture meters to maintain optimal levels.
Avoid overwatering or waterlogging.
Environmental Factors:
Monitor temperature and humidity levels.
Provide shade during excessive heat or protect from heavy rains.